Monday, 1 September 2014

Quilled Birthday Card


Well, it's been forever since I posted anything........summer holidays.  However, one thing I've really enjoyed doing yesterday was to make one of my personalised quilled cards.  


The brief was 80th birthday for an auntie who was a teacher, plays piano and lovers her cats. 

Ta-dah!


In case you're wondering the music on the piano should play Happy Birthday to You (right hand only) and each page is about one and a half centimetre square. 


Monday, 19 May 2014

Plaited back T-Shirt


Here's the front.

So it's been a while since I've posted anything but I've finally got around to fitting in a crafty diversion. I've seen lots of ways to upcycle clothing, especially T-shirts, and this weekend decided to try one idea out - the plaited back T-shirt.


I found a T-shirt I was happy to customise. First you need to turn your T-shirt over and cut off the bottom hem - if there is one (they don't plait well).


Now you can cut a slit right across the back of the T-shirt, about halfway down depending on the length of your T-shirt (below your brastrap!). From below this point, cut the rest of the back of the T-shirt into strips. Make sure you cut the strips in sets of three. Leave the strips attached to the T-shirt at one end but cut them apart from the other. Alternate which sides you leave the strips attached to. (I lightly marked out the strips before I cut).


If you gently pull the T-shirt strips they become more like cords (see photo) - continue to do this while you are plaiting. 

Taking three cords at a time, you can now plait them and then pin the plait to the other side of the T-shirt. 


Carry on until you have plaited and pinned all the cords. 


Remember the hem I cut off? I used a piece of that to gather the plaits together. Though a little tricky, what with all the pins, you can try your creation on and adjust to fit.  


Finally sew all the plaits into place and secure the 'knot'. Wear it with (or without) a vest top!

Thank you Model 1, longer style plaited back.

Thank you Model 2, shorter style.

Saturday, 29 March 2014

Tree of Life Banner (3)


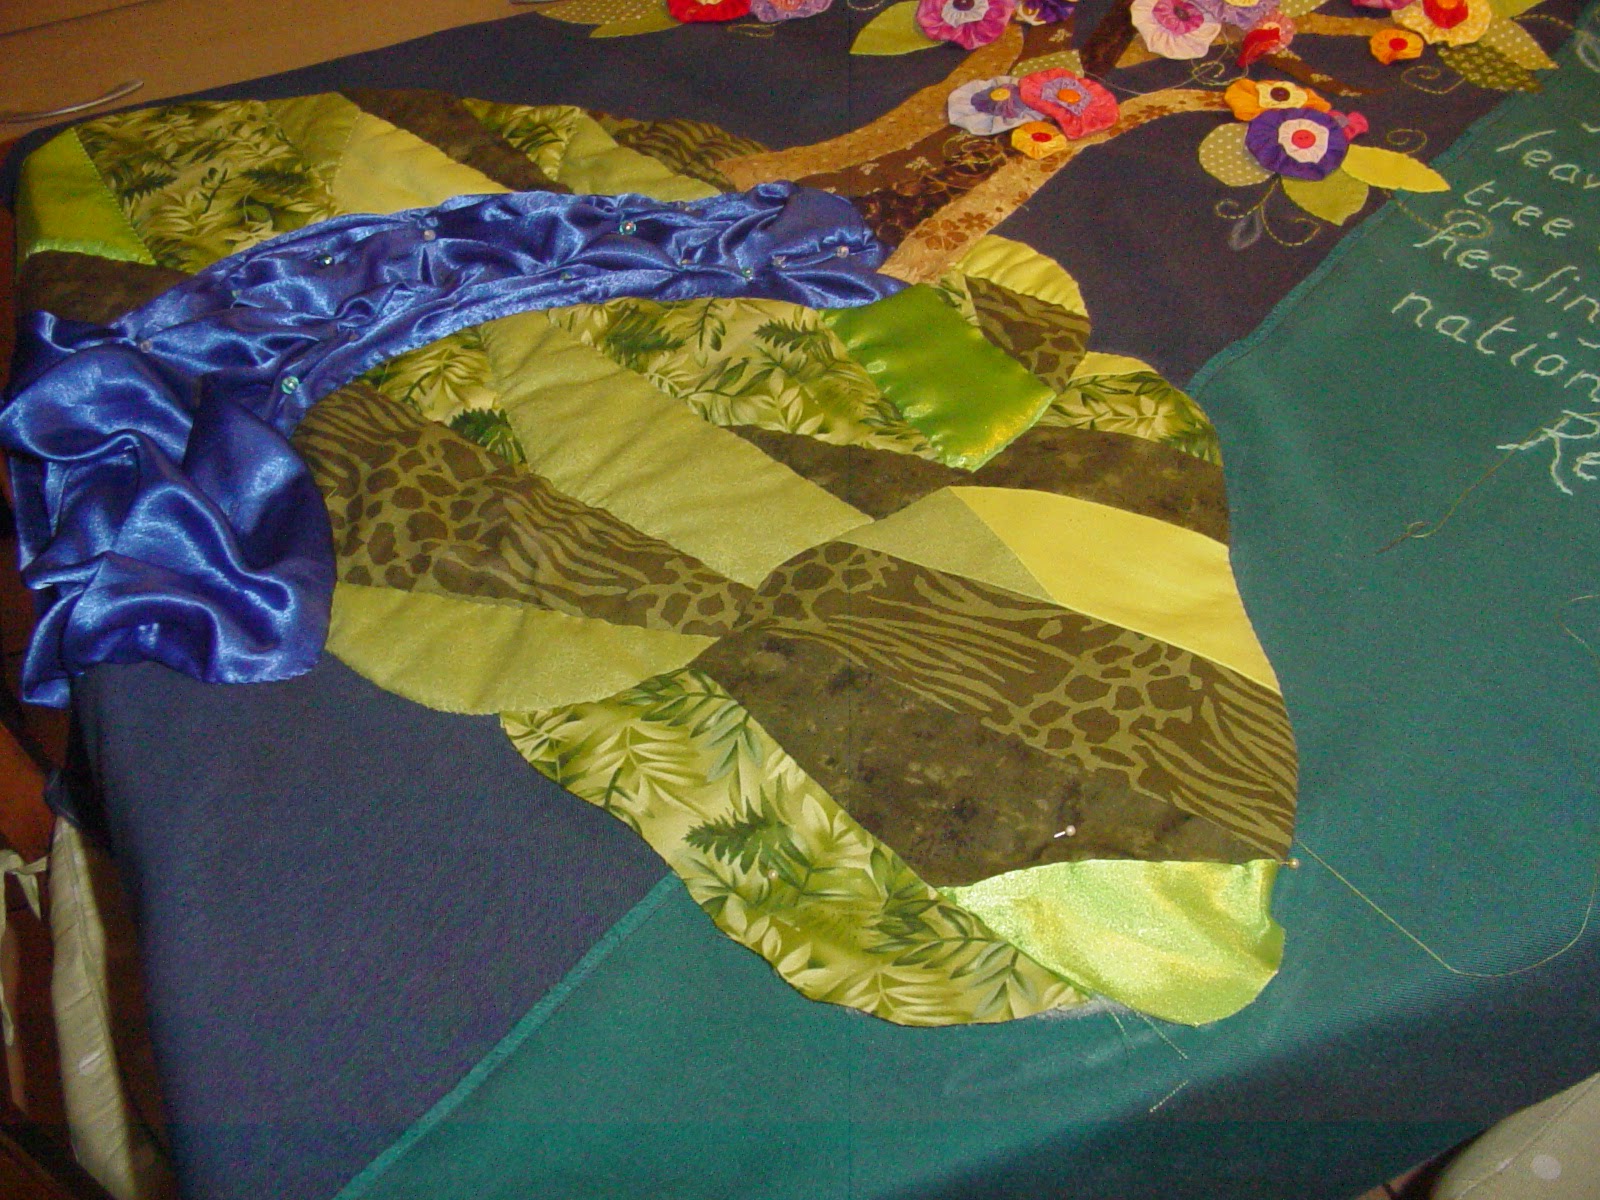
So on the newly attached right hand side, I used a split stitch to add the biblical quote from Revelations 22.2. It says 'And the leaves of the tree are for the healing of the nations.'

This is also the point at which I didn't know where to stop. Over time (quite a long time!) I added a butterfly (to symbolise new life) more fruit, more leaves, hand stitched tendrils and added buds. 


The buds are yo-yo's too but a started with a leaf shape rather than a circle.


 Most noticeably I added a whole new patch of quilted field! 


A pocket for the pole.


Eventually I reached a point where I was happy with the whole design and then spent the next few days assembling the banner. I backed the banner with the same heavy material in reverse - so the back is black. I made tab tops and created a pocket at the bottom of the reverse so that I could slip a pole in here to help the banner hang straight. It really worked!


A lot of the colour was on the left hand side so to balance it out a bit I made my own multicoloured bias binding from the material I had used for the yo-yo's and hand stitched it to the left hand side. Finally finished!


Well, it only stayed at home finished for one evening. I've took it down to church the following morning and handed it over so they can decide where to hang it.


The finished banner.......


I'll take a better photo when it's hanging in church.
Well it took the best part of fifteen months to make the banner. I went through so many different ideas and lots of trial and error. The process was quite fluid and the design changed as I went along. It's always hard making something for others when the brief is so wide - you're never really sure of whether it's going to be what the audience are hoping for. 


The banner has not been hung yet but i hear a select number of people have seen it and I've received some lovely compliments. Which is a good as I've already been asked to get crafting on more projects...........

Tree of Life Banner (2)


Well, I had a number of ideas of how I would make the branches of tree. These included rolling material into tubes and then stitching it on, making material tubes and stitching them on or quilting strips straight onto the banner.


The idea was to avoid having to appliqué the tree....fiddly. However, having spent some time trying other methods and failing to make any of them work I've eventually returned to simply cutting material and appliquéing it onto the banner!!!!


I am though pleased with the results .....


The dark patches are where I was damping off chalk lines!
The next part was to start making the fruit and leaves of the tree. I settled on using fabric yo-yo's and buttons for the fruit and appliquéing fabric leaves onto the tree.


Making fabric yo-yo's

If you haven't made fabric yo-yo's before, they're quite simple. First cut out a circle of fabric, then sew a running stitch around the edge (if you turn the edge over first it will make for a neater finish) and lastly pull the running stitch to gather the fabric in.


Part way into this stage I decided the banner needed to be bigger! So, I attached another strip of different coloured banner material to right hand side (not shown in these photos). Part of the reason for this was so that I had room to embroider some wording or a biblical quote onto the banner - coming later. 


The heading was possibly the trickiest part of the banner. After a lot of trial and error, I stitched shiny blue lettering, which I had stiffened with iron-on web to stop it fraying, to the banner using a tight zigzag stitch over the edges. Later I also added hand stitched backstitch in gold to make the lettering stand out more.


Nearly there......


Tree of Life Banner (1)


I'm making a banner for our church, All Saints Higher Walton.  The theme of the banner is healing.  After a little research I've decided to base the design on the Tree of Life with a flowing river.


As usual, I'm up for having a go at any creative task - but doesn't mean I'm expert in any of them!  I drew out a few ideas and then went shopping with a friend for material.  I found a heavy material that looked like it'd hang well and lots of small pieces of green patterned material. 


Once'd I'd drawn out the basic idea in chalk on the material, I set to work. Looking at the material I had, I tried out a couple of different ideas until I settled on a kind of crazy patchwork look for some fields. 


I cut strips of material out and tacked them together at an angle until I thought it looked good. I then shaped each side panel and backed them onto wadding. I quilted the 'fields' onto the banner material and appliquéd  around the edges.


I found a large piece of silky blue material at home which just seemed to 'flow'.  So, I pinned the material into the gap for the river, stitching the hemmed edges of the blue material right next to the field panels and loosely gathering the rest using pins. I'm not using any particular method, just pinning and sewing until it looks right. 

To hold all the gathers in place I stitched through the gathers with silver thread and to add some sparkle I've stitched some crystal beads into most of the gathering points.


 And now for the Tree......