Friday 26 December 2014

Christmas Wreath


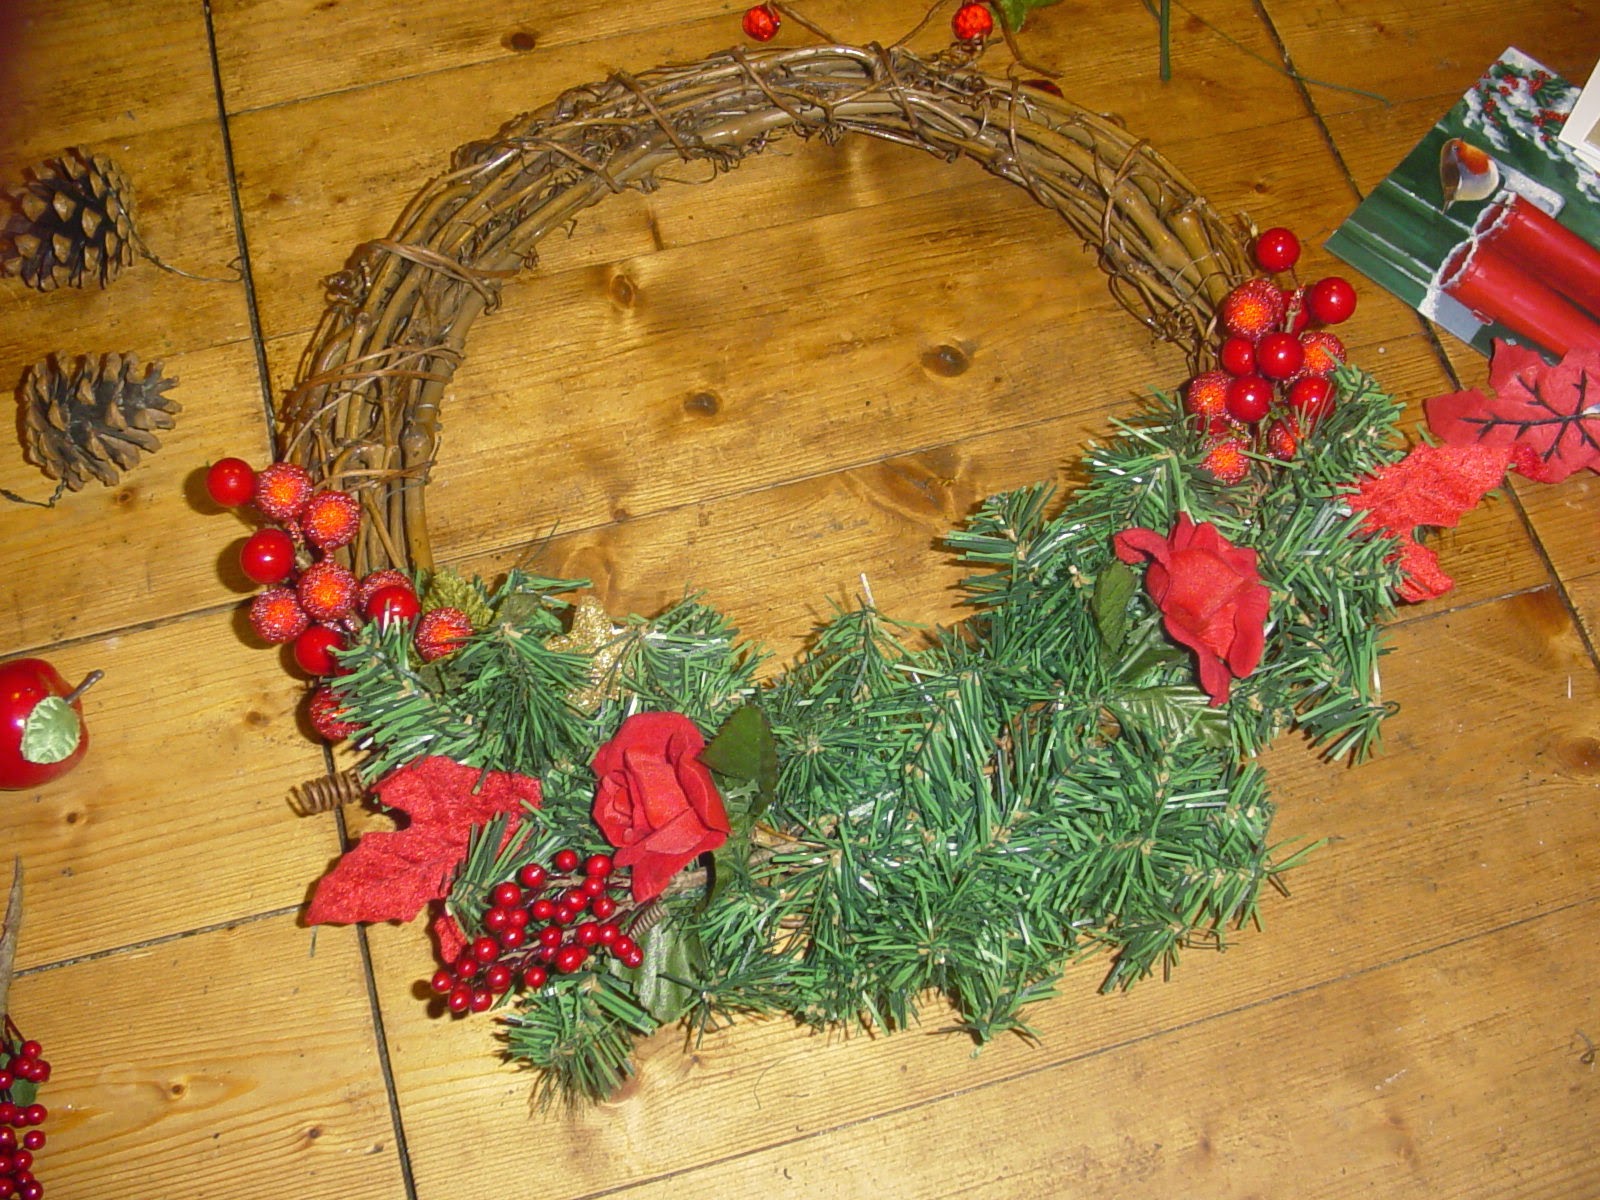
I just can't seem to get enough Christmas decorations! This year I've added a new wreath over the fireplace. It needed to match the swag on the fireplace, so it's red, green and gold. 


I started with a plain wicker wreath and wrapped a piece of fake greenery around the bottom. 


Then I simply added Christmas trimmings, tying them in as I went. 


Over the last years I have collected the odd bit of Christmas trimmings - plenty left for next year! 


Finished wreath!


Origami Christmas


I needed an idea for last minute Christmas cards for the kids and my Mum. Origami was a new way to go. I did end up spending some time practising before I settled on a couple of designs which I thought I could make with small squares of paper.  I used 9cm squares of paper for the santas and a 12cm square of paper for the dove. I used Christmas printed paper - looks nice but hard to fold especially when small.


The kids thought they were really cute! There are lots of websites for Christmas origami but the ones I eventually used were:

http://www.origami-make.com/howto-origami-bird.php
http://www.origami-resource-center.com/santa.html


I also wanted an idea for an attractive way to give my eldest daughter some money. Again lots of websites filled with plenty of original ideas but we used this one because you can make them using any notes (so long they are all the same).

 Also, many of the ideas use dollar bills - so use lots of notes! We made an origami star out of our British banknotes and presented in a CD case.


To top off our origami Christmas, we folded cloth napkins to make Christmas trees for our Christmas lunch. 


http://www.handimania.com/diy/christmas-tree-napkin-fold-all-steps.html


Sunday 21 December 2014

Anniversary Gift


This year was our 20th wedding anniversary. Traditionally, it stands for china but we didn't need ornaments or dining sets and a trip to China was likely out of the question so....inspired by Pinterest I made a photo gift.


The general idea was to take pictures of the children in positions forming the numbers of our wedding date - 3.9.14.  We tried several ideas but eventually settled on photos where the children made the numbers with their bodies. The trickiest to film was my son on the trampoline - I had take the photo before he actually jumped in order to catch the number he made.


After I'd put the photos onto the computer I changed them to tasteful black and white. Still not sure though if I prefer them in the original colours, will probably print them out one day to compare.


For your information, my husband found me some china-themed gifts including green tea from China and the 80's film 'Big trouble in Little China'!


Mini Christmas Quilts


 This week, I decided to make some Christmas mini-quilt gifts for friends.


I started by drawing out a word filled Christmas tree design which I transferred to material. I stitched the tree and star design using 'outline stitch' (maybe not as neat as it should be looks effective). 

I use a great stitching reference site called http://www.embroidery.rocksea.org/
I thought the satin pot would be hard to appliqué so I ironed that on.


I used a selection of Christmas materials to build up the simple quilt block. I chose a neutral fabric for the backing. Once I had sandwiched the three materials (front, wadding, backing) together I hand quilted around the Christmas tree but machine quilted the rest. A hand stitched red bias binding finished the mini-quilts along with a piece of ribbon for hanging.

I was really pleased with these. They looked nice when all placed together. Next project - make a full size Christmas quilt or use this idea to make some cushion covers!!


Poppy Brooch


This year I've made my own poppy brooch for Remembrance Day. I started by cutting rounds from red chiffon. My rounds were 4-5cm approx (didn't measure as usual!). 


Note - a tea light is easier to use than a candle!


The trick then is to lightly singe all around the edges of each round by holding it over a flame - mind your fingers!. This causes the rounds to maybe crinkle a little and curl up, giving them a more petal-like shape. It may need a bit of practise.


Once you have the petals, simply lay them on top of each other until you have the right shape. My poppies have about 8 petals each. I then secured them together with a few stitches in the middle.


As I was making a poppy I stitched a large black button into the middle and also wrapped and stitched in some black, fluffy wool around the button for more effect. However, they would probably be just as effective without the extra wool.


I also added green leaves using the same flame technique for the petals but starting with a leaf shape. I had several goes at this as I kept melting off parts of the leaf!


To finish I glued a circle of felt, with two small slits in the centre to the back and attached a safety pin through the slits. This was ok for me - but you can use other ways to make it more secure.


You can use this technique to make different coloured flowers - I've decorated my daughter's prom dress with ivory ones and used beads in the centres instead.


Friday 31 October 2014

College Bag


The original skirt
My daughter was looking for a new bag for college and just couldn't find what she wanted - so she decided we could make one! As usual, this was a one-off project without a pattern and only a vague plan. Having browsed tinternet she decided she liked the idea of using recycled material. So we bought a large tartan skirt at a charity shop for all of 50p and found a pair of old jeans at home.


Turned inside, cut to size and
pinned ready for stitching up
As the skirt already had a lining, the general idea (for this easy project) was to cut off the top of the skirt and its waistband to make the top of the bag. This seemed like a good idea but the skirt was actually wider than we needed - so that needed adjusting - and later it was super difficult to then make the bottom of the lining and bag. 


Jeans pocket in place
Denim decoration
Before the super difficult part I used the jeans pocket for an outside pocket and a strip of denim for decoration. 


So to the super hard bit. My daughter wanted a curved look to the bag so I first cut a long oblong piece of both denim and matching lining (I had some leftover from the bottom of the skirt).  Somehow I managed to to gather the tartan and stitch to the denim oblong. Repeated with the lining.  This was particularly tricky as the lining was already attached to the skirt and I was working from a pattern. No nice 'how to guides' as just a lot of fiddling involved. 


Jeans leg cut and stitched
closed at ends
Anyway now to a clever bit! I used the leg of a pair of jeans to make both a flap over finish and an inside zip-up pocket at the same time. 


I inserted a zip onto the reverse of the jeans leg. This will turn the jeans into an inside pocket.


I then firmly stitched the jeans leg to the back waistband of the bag.


The strap was also recycled from another charity shop bag we bought for 50p, and stitched on with some more leftover denim.


Ta-dah!!!!!!!!


Handily, the skirt's side zip is at the side of the bag and so it can be opened to create a little more space in the bag. As I say, I'm not known for following patterns, so it was simply a case of cut and sew and see how it turns out. The finish at the bottom is not great - it was hard to make the lining and tartan match and it was tricky fixing in a piece of card to make it sturdier. 


Admittedly in terms of time taken it's probably easier and quicker to get the material and cut from a pattern. However, my daughter now has an individual bag she loves - so much so she doesn't want to waste it on college! Aarggh!
Thursday 30 October 2014

Zentangles


This week I made some very early Christmas cards with the children in year 5/6. "Why so early?" I hear you ask. Well, we send them off to be printed and made into packs of four that parents are then asked to buy, as a means of fundraising.


So, I read up a bit on zentangling. Turns out it's not just doodling. Zentangles are made of abstract, repetitive patterns and traditionally black and white. They are also meant to be meditative and unplanned. So our aim was to have a very chilled art session - result!


The method is fairly simple. First draw your basic shape. Then add some lightly drawn pencil lines called 'strings' to give some form. Next ink in the strings. Now you can start creating 'tangles' in the spaces.   


Although zentangles are meant to be unplanned and hand drawn, I did prep some stencils for the children and provided some example sheets. 


I think they did a fantastic job!


Anyway I shall be off now to do a bit of my own zentangling!

Monday 1 September 2014

Quilled Birthday Card


Well, it's been forever since I posted anything........summer holidays.  However, one thing I've really enjoyed doing yesterday was to make one of my personalised quilled cards.  


The brief was 80th birthday for an auntie who was a teacher, plays piano and lovers her cats. 

Ta-dah!


In case you're wondering the music on the piano should play Happy Birthday to You (right hand only) and each page is about one and a half centimetre square. 


Monday 19 May 2014

Plaited back T-Shirt


Here's the front.

So it's been a while since I've posted anything but I've finally got around to fitting in a crafty diversion. I've seen lots of ways to upcycle clothing, especially T-shirts, and this weekend decided to try one idea out - the plaited back T-shirt.


I found a T-shirt I was happy to customise. First you need to turn your T-shirt over and cut off the bottom hem - if there is one (they don't plait well).


Now you can cut a slit right across the back of the T-shirt, about halfway down depending on the length of your T-shirt (below your brastrap!). From below this point, cut the rest of the back of the T-shirt into strips. Make sure you cut the strips in sets of three. Leave the strips attached to the T-shirt at one end but cut them apart from the other. Alternate which sides you leave the strips attached to. (I lightly marked out the strips before I cut).


If you gently pull the T-shirt strips they become more like cords (see photo) - continue to do this while you are plaiting. 

Taking three cords at a time, you can now plait them and then pin the plait to the other side of the T-shirt. 


Carry on until you have plaited and pinned all the cords. 


Remember the hem I cut off? I used a piece of that to gather the plaits together. Though a little tricky, what with all the pins, you can try your creation on and adjust to fit.  


Finally sew all the plaits into place and secure the 'knot'. Wear it with (or without) a vest top!

Thank you Model 1, longer style plaited back.

Thank you Model 2, shorter style.