Wednesday, 18 February 2015

Cushion Cover


Just before Christmas, I made up a simple cushion for a friend, to give to her as a surprise Christmas gift. However, when I'd finished I measured the cover against the cushion I had bought - and it was far too small! I don't know where I went wrong and though I could probably have just bought some smaller cushions, I decided instead to make them bigger using the remaining matching material.


The original cushion was a simple flap over fastening - no zips - held with a couple of buttons.  I kept the fastening 'as was', deciding not to make my alteration any harder.  I decided to unpick the original cushion and then add on 2 inch strips all the way round back and front of the original cushion. I even overstitched the edges as the material tended to fray! Yes it was a bit more 'faffing' about!


Once I had two new improved cushion sides, I matched up back and front (back to back) using pins to hold the sides together in the right places - at the corners - while I stitched the sides together.


Overall I was really pleased with the finished cushion (I actually made two) - and I decided not to tell my friend about my original mistake - of course if she ever reads this..........!


Native American Costume


This week at school our class had a Native American Day as part of our Road Trip USA theme. We had a fantastic day which included making headdresses, building teepees, learning to sing Native American camp songs and having a Native American banquet. 

Of course it also meant I needed a Native American costume.
We decided to keep our costumes fairly simple - tan coloured top and black trousers would do (we would be outside building teepees for some time - in February!).

I acquired my basic t-shirt from my husband - obviously offering to buy him a new one! I started by cutting the sleeves into strips and pulled each strip to make them more cord like. 


For embellishment I used some recycled fringing (possibly from furniture) that I had picked up at a local recycling centre called SAMS, where school have an account. I hand-stitched the fringing around the bottom and around the neckline - would have been far quicker to do it on the machine though. To finish I found some plastic beads that I hand-sewed onto the fringing. Teemed the top with a leather belt I already had and voilà! 


Take a look at our terrific Totem poles too. We've been making them over the last few weeks in art and they took pride of place in our Native American camp. The banquet was also the pick of foods the children had cooked and tasted over the past few weeks. It included Native American bread, soup, tortillas and cake! Hopefully recipes to follow.


Knitted Fingerless Gloves


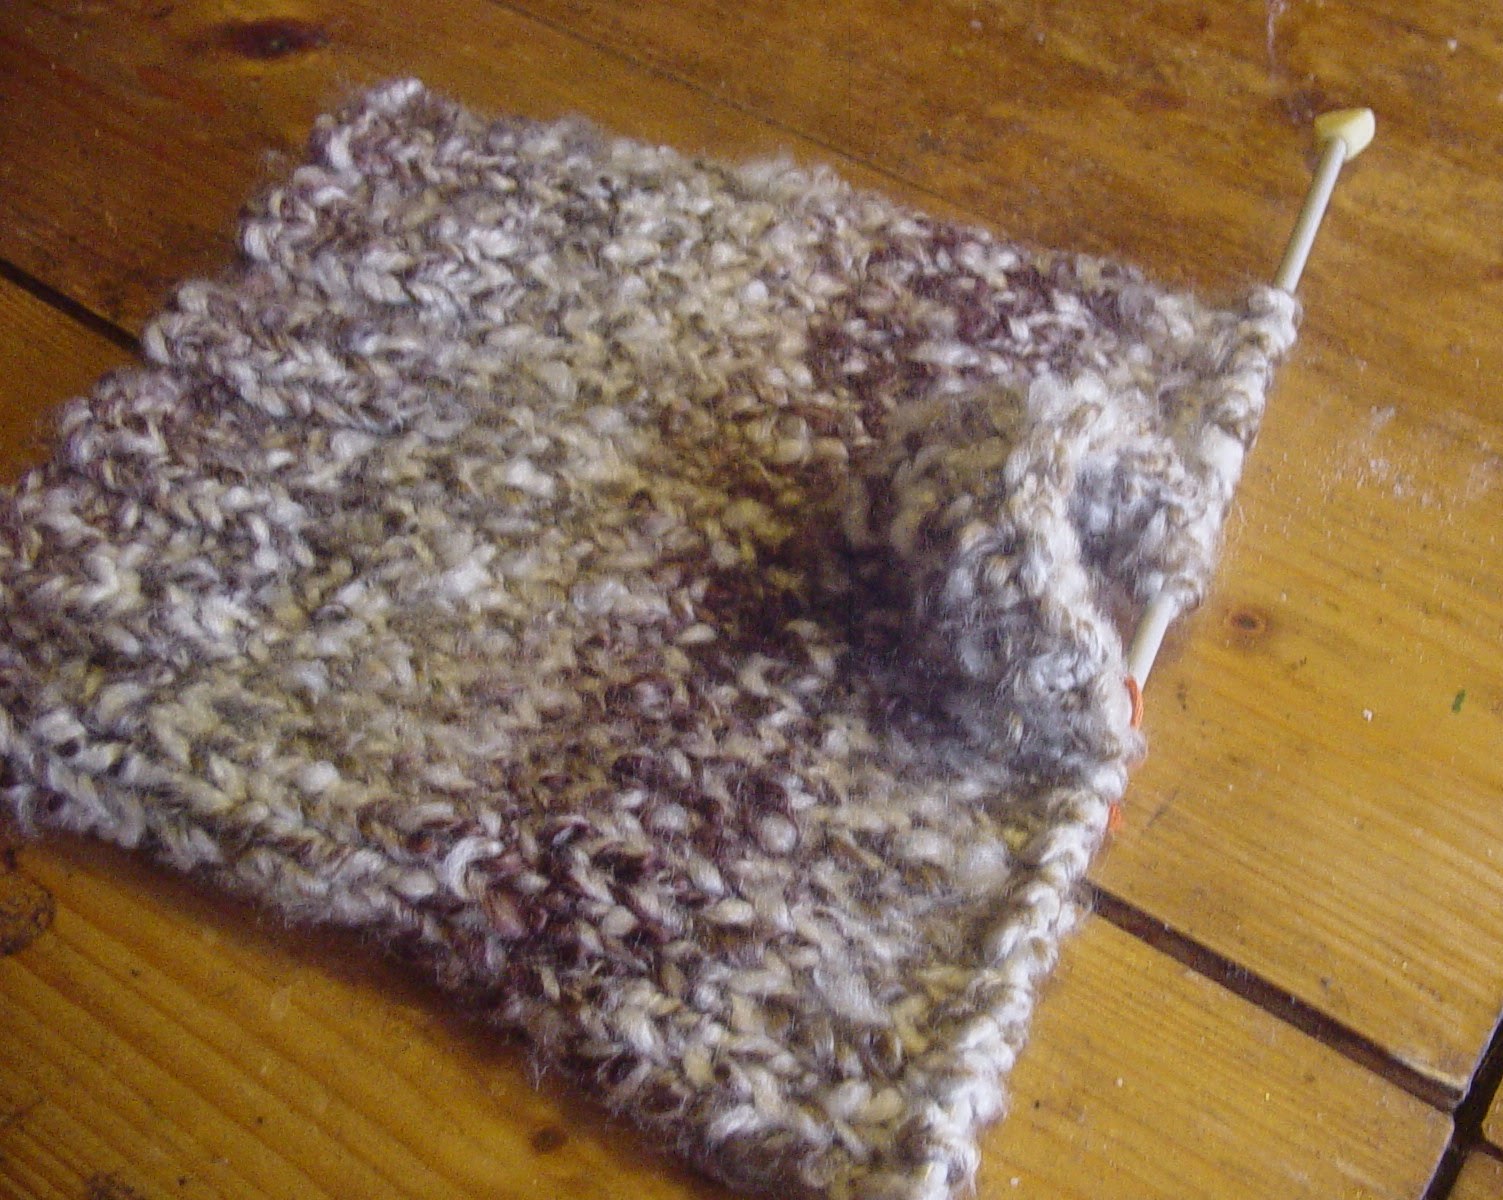
Well, here comes post three this week! I finally got around to making the gloves that the wool I used for the phone sock owl, was originally intended for.

Lots of websites have fingerless glove patterns, working in the round (using three/four needles), but I've never done that so was thrilled when I came across one using just two needles. It does mean there will be a seam up the side but I think with the wool I'm using it won't be too obvious. 

I've used a chunky twist wool which means I had to adapt the pattern that I had originally found. So here goes.....


Cast on 24.

K2, P2 for 10 rows - gives ribbing effect if casting on a multiple of 4.


Knit row, purl row for 16 rows, ending on a purl row.
To make the thumb hole:
K11, place marker, K2, place marker, K11
(For marker I made a small loop of thread by wrapping it and knotting around a pencil.)


Then...purl row.
K11 slip marker over, increase 1 stitch through back of stitch, increase 1 stitch through back of stitch, slip marker over (I now have 26 stitches).
Purl row.
K11, slip marker over, increase stitch, K1, K1, increase stitch, K11 (making 28 stitches).
Purl row
Continue to increase one stitch after the first marker and one stitch before the second marker on each knit row, with purl rows between, until there are 10 or 12 stitches (depending on thumb size required) between the markers. Finish on a knit row.


Cast off the thumb.
Purl to the first marker, cast off 12 stitches, purl to end - removing markers!
Knit 10, til there is one stitch before the casted off thumb. Knit into the back of the stitch on the LH needle (without slipping it off) and then knit the last stitch on the RH needle. this twists the wool making a stronger stitch but is a little fiddly. Knit to end. 


At this point I found I had 22 stitches and not back to my original 24! Maybe because two of the original 24 were the starting point for the thumb. Anyway there were no holes so I carried on.
Purl the next row.
At this point it depends how large your hands are and how far up you want the gloves to finish.
I did 1 more knit row and 1 more purl row, before going back to the rib pattern for another 8 rows.
**As I now had 22 stitches, which is not a multiple of four, the pattern for the ribbing had to become first row K2, P2 to end on K2, then second row P2, K2 to end on P2 - otherwise you lose the rib pattern. 


To finish, I turned them inside out and sewed up the side seam.


Here are the finished gloves as modelled by teen daughter.
Apparently they are extremely warm and have gone done as quite cool with her friends!


Saturday, 31 January 2015

Wedding Acceptance Card


This week a friend asked me to do a nice Wedding Acceptance Card for her. I haven't done one of these before! I decided to quill a large white butterfly with a couple of hearts. I added a little glitter gel on the butterfly. 


Whilst we were catching up she also asked me if I would like to have a card stall at her school's PTA Ladies Night on February 27th - just in time for Mothers' Day. I always have some card stock at home but I'll need to make more! I'll let you know how I get on.

Owl Phone Sock


I've been quite crafty this weekend, so this is the first of three posts! To start with, my youngest daughter really needed a phone sock. After looking at ones to buy I remembered that I had some spare wool (bought originally for gloves) that would possibly make a nice knitted owl phone sock.


All I needed to knit was a long rectangle. The width is the width of the phone plus a bit and the length is double the length of the phone plus extra to make a flap over finish. I knitted the flap-over-end in all rows knit and the rest in stocking stitch - 1 row knit, 1 row purl. Once I had my rectangle I sewed up the sides (leaving the end to flap over) to make the basic sock. 


I used a press stud to close the sock (advice would be to use the largest press stud you can).
A few strands of wool at the corners made the ears (apparently it's an eagle owl, according to youngest daughter).


I made the owl eyes using circles of felt attached with buttonhole stitch and buttons for the centres. 


I always use http://www.embroidery.rocksea.org for nice clear stitch instructions. The beak is two pieces of felt held together, and stitched to the sock, with buttonhole stitch.  


To finish, I used a similar idea for the wings.


See what else I've been up to next.....

Friday, 26 December 2014

Christmas Wreath


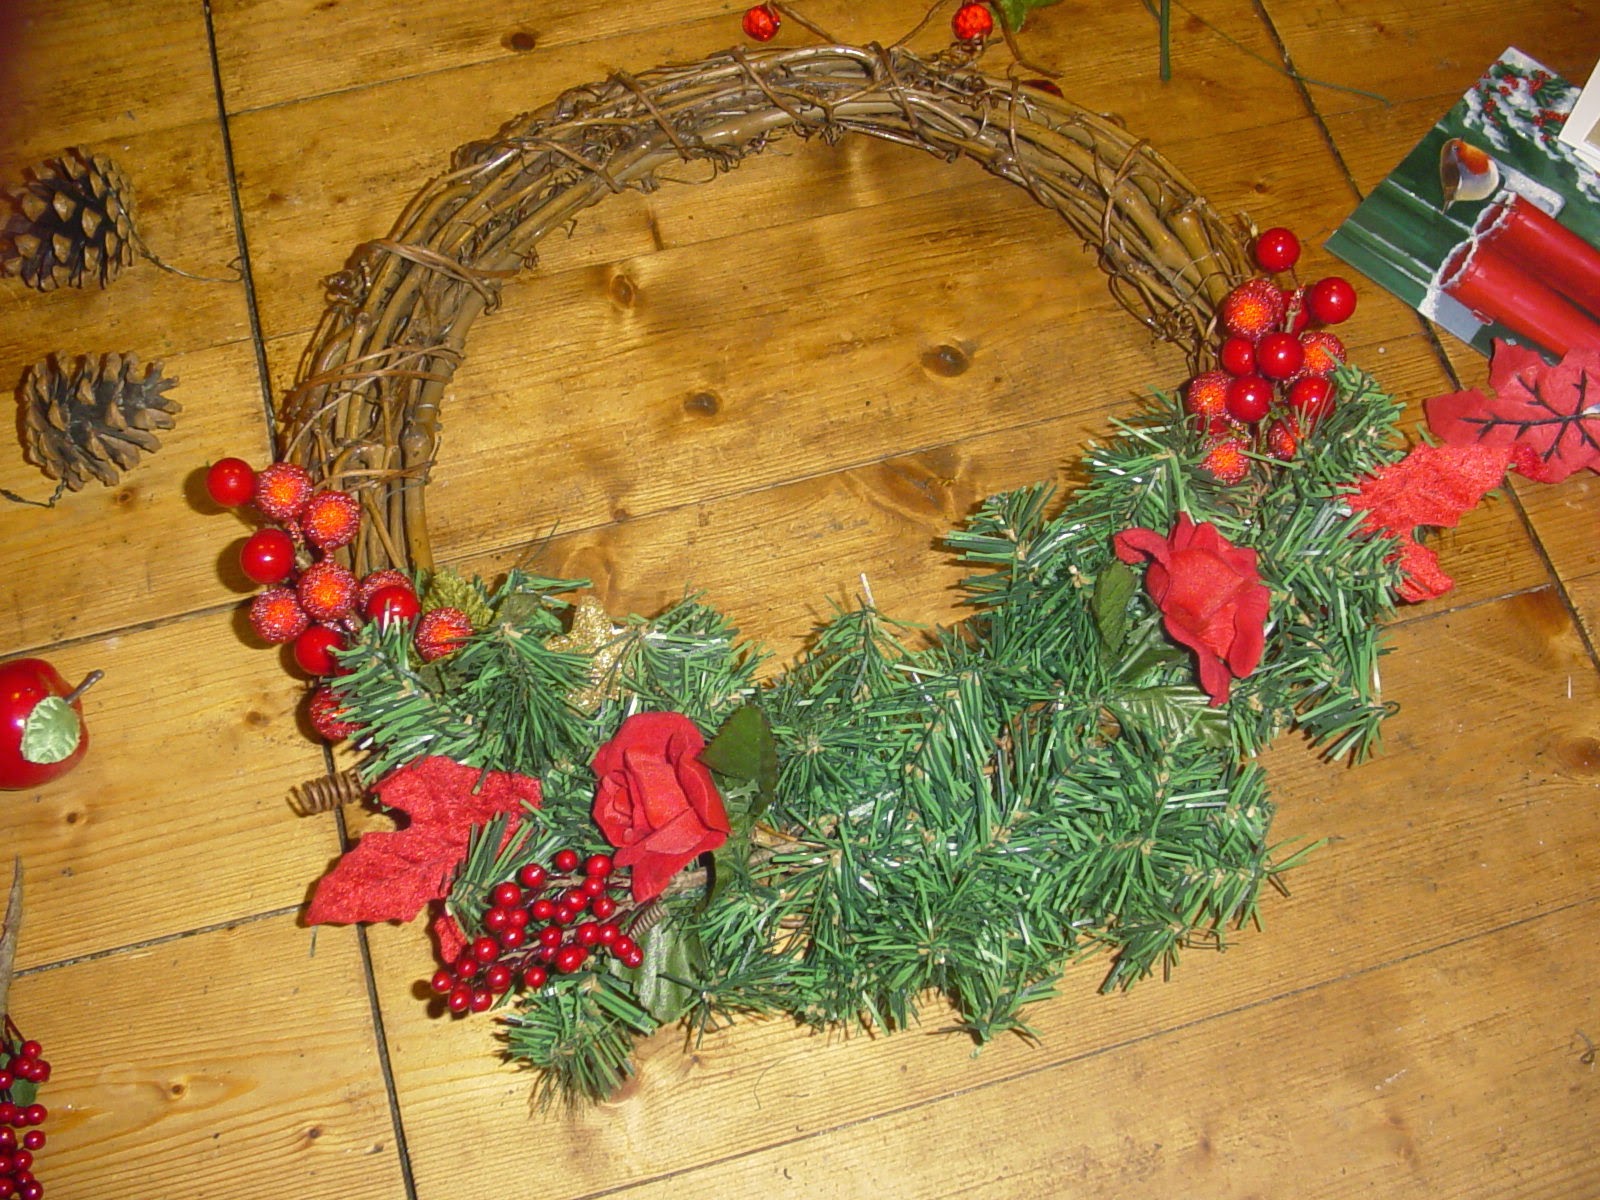
I just can't seem to get enough Christmas decorations! This year I've added a new wreath over the fireplace. It needed to match the swag on the fireplace, so it's red, green and gold. 


I started with a plain wicker wreath and wrapped a piece of fake greenery around the bottom. 


Then I simply added Christmas trimmings, tying them in as I went. 


Over the last years I have collected the odd bit of Christmas trimmings - plenty left for next year! 


Finished wreath!


Origami Christmas


I needed an idea for last minute Christmas cards for the kids and my Mum. Origami was a new way to go. I did end up spending some time practising before I settled on a couple of designs which I thought I could make with small squares of paper.  I used 9cm squares of paper for the santas and a 12cm square of paper for the dove. I used Christmas printed paper - looks nice but hard to fold especially when small.


The kids thought they were really cute! There are lots of websites for Christmas origami but the ones I eventually used were:

http://www.origami-make.com/howto-origami-bird.php
http://www.origami-resource-center.com/santa.html


I also wanted an idea for an attractive way to give my eldest daughter some money. Again lots of websites filled with plenty of original ideas but we used this one because you can make them using any notes (so long they are all the same).

 Also, many of the ideas use dollar bills - so use lots of notes! We made an origami star out of our British banknotes and presented in a CD case.


To top off our origami Christmas, we folded cloth napkins to make Christmas trees for our Christmas lunch. 


http://www.handimania.com/diy/christmas-tree-napkin-fold-all-steps.html


Sunday, 21 December 2014

Anniversary Gift


This year was our 20th wedding anniversary. Traditionally, it stands for china but we didn't need ornaments or dining sets and a trip to China was likely out of the question so....inspired by Pinterest I made a photo gift.


The general idea was to take pictures of the children in positions forming the numbers of our wedding date - 3.9.14.  We tried several ideas but eventually settled on photos where the children made the numbers with their bodies. The trickiest to film was my son on the trampoline - I had take the photo before he actually jumped in order to catch the number he made.


After I'd put the photos onto the computer I changed them to tasteful black and white. Still not sure though if I prefer them in the original colours, will probably print them out one day to compare.


For your information, my husband found me some china-themed gifts including green tea from China and the 80's film 'Big trouble in Little China'!


Mini Christmas Quilts


 This week, I decided to make some Christmas mini-quilt gifts for friends.


I started by drawing out a word filled Christmas tree design which I transferred to material. I stitched the tree and star design using 'outline stitch' (maybe not as neat as it should be looks effective). 

I use a great stitching reference site called http://www.embroidery.rocksea.org/. 
I thought the satin pot would be hard to appliqué so I ironed that on.


I used a selection of Christmas materials to build up the simple quilt block. I chose a neutral fabric for the backing. Once I had sandwiched the three materials (front, wadding, backing) together I hand quilted around the Christmas tree but machine quilted the rest. A hand stitched red bias binding finished the mini-quilts along with a piece of ribbon for hanging.

I was really pleased with these. They looked nice when all placed together. Next project - make a full size Christmas quilt or use this idea to make some cushion covers!!


Poppy Brooch


This year I've made my own poppy brooch for Remembrance Day. I started by cutting rounds from red chiffon. My rounds were 4-5cm approx (didn't measure as usual!). 


Note - a tea light is easier to use than a candle!


The trick then is to lightly singe all around the edges of each round by holding it over a flame - mind your fingers!. This causes the rounds to maybe crinkle a little and curl up, giving them a more petal-like shape. It may need a bit of practise.


Once you have the petals, simply lay them on top of each other until you have the right shape. My poppies have about 8 petals each. I then secured them together with a few stitches in the middle.


As I was making a poppy I stitched a large black button into the middle and also wrapped and stitched in some black, fluffy wool around the button for more effect. However, they would probably be just as effective without the extra wool.


I also added green leaves using the same flame technique for the petals but starting with a leaf shape. I had several goes at this as I kept melting off parts of the leaf!


To finish I glued a circle of felt, with two small slits in the centre to the back and attached a safety pin through the slits. This was ok for me - but you can use other ways to make it more secure.


You can use this technique to make different coloured flowers - I've decorated my daughter's prom dress with ivory ones and used beads in the centres instead.